 In this post I describe how I built a serverless cluster discovery service for rqlite, the distributed relational database built on SQLite.
Built using the AWS API Gateway service, AWS Lambda, and DynamoDB, it means rqlite nodes no longer need to be passed the network address of an existing node in a cluster, and can instead connect automatically.
Using a Discovery Service makes it much simpler to create fault-tolerant clusters that form automatically, and could even seamlessly autoscale.
Design
Below is a diagram showing how all the various systems fit together.
 The API gateway faces the Internet, exposing a HTTP API that end-users and rqlite nodes can access. API calls are routed by the Gateway to Python code hosted by the AWS Lambda service. This code, in turn, reads and writes data stored in DynamoDB.
Before setting out on this project I had zero experience with the API Gateway Service and AWS Lambda, and only basic familiarity with DynamoDB. Considering it took me only about 20 hours (spread across 5 evenings) to build the entire system — a system that should be highly reliable, practically maintenance-free, and extremely cheap to run — that’s pretty impressive.
The Discovery Service allows an end-user to create a Discovery ID, which can then be passed to any rqlite node on startup. The node then uses this ID to register its network address, and retrieve the network addresses of other nodes that registered using the same ID (if any). That way the node can join an existing cluster, or become the leader if no other node has yet registered. By using the Discovery Service, rqlite nodes no longer need to be passed an explicit network address making it much easier to form clusters.
Let’s dig into the configuration of each system.
AWS Lambda Code
You can find the full source code for the AWS Lambda handler on GitHub.
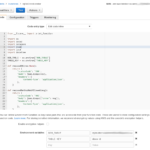
I actually developed this part first. AWS provides many helpful example code snippets, that show how to access many common services from the Lambda system — including example code for a HTTP microservice that accesses DynamoDB. I’m an experienced Python programmer so copied and modified some example Python microservice code. This was probably the most tedious part of the process, because the DynamoDB API documentation is a little unclear. I made heavy use of CloudWatch logging to develop and debug the code.
 |  |
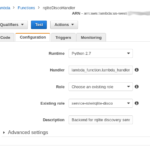
The screenshots show the configuration of the AWS lambda handler. I used environment variables to pass in the actual DynamoDB table, so the code remains free of specifics.
API Gateway
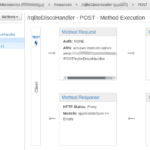
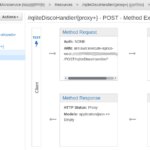
This probably took the longest time to understand, but even then it wasn’t too difficult. The UI is a little clunky, but AWS have a set of templates that make it easy to get up and running quickly.
 |  |
The screenshots above show the configuration for the various parts of the Gateway. It shows routing for initial creation of a Discovery ID, as well as support for node registration. Each of these routes, and the supported HTTP methods, had to be explicitly added and connected to the the Lambda function I created earlier. Lambda functions are hosted in a specific AWS region, so I had to select the relevant region when connecting the Gateway to the function.
DynamoDB
I also needed a single table in DynamoDB. The table schema is quite straightforward — an example item is shown below. I use string types for the key and timestamp, and a string set type for the list of nodes addresses. This ensures that re-registration of an address is idempotent.
In the first case no nodes have been registered yet:
{

  "created_at": {

    "S": "2017-03-01 05:58:13.774670"

  },

  "disco_id": {

    "S": "0e9c7b0e-fe44-11e6-b211-06425c6fcd6f"

  }

}
In the second case, two nodes have registered — one at 192.168.0.1, and another at 192.168.0.2. When a third node registers with the service, using the discovery ID shown in the example, it learns the addresses of the other two nodes in the cluster.
{

  "created_at": {

    "S": "2017-03-01 05:58:13.774670"

  },

  "disco_id": {

    "S": "0e9c7b0e-fe44-11e6-b211-06425c6fcd6f"

  },

  "nodes": {

    "SS": [

      "http://192.168.0.1:4002",

      "http://192.168.0.2:4003"

    ]

  }

}
The primary partition key for the table is disco_id, and I increased the read and write throughput to 10 units, from the default of 5.
Testing
During development I performed end-to-end testing using curl like so:
$ curl -XPOST -L -w "\n" 'http://discovery.rqlite.com'

$ curl -XPOST http://discovery.rqlite.com/0e9c7b0e-fe44-11e6-b211-06425c6fcd6f -H "Content-Type: application/json" -d '{"addr": "http://192.168.0.1:4003"}'
Once I was happy with the system I added support to rqlite itself, to allow it to use the Discovery Service.
Try it out for yourself
 If you’ve like to try out the new Discovery Service yourself, and see how it easy it is to create an rqlite cluster, simply download and run rqlite v3.12.0 (or later). It’s now easier than ever to run your own distributed relational database.